
Deploying rewarder contract for communities on Mantle Testnet
DAOs and Rewards go hand in hand. In this tutorial, we will learn how to deploy a contract that will reward 100 tokens to users who hold an NFT on Mantle Testnet.
This is a great way to get started in writing smart contracts.
Before we get started with development, let me explain what the Mantle network is.
Mantle Network is a layer 2 solution built on top of the Ethereum blockchain which aims to offer super scalability by implementing a modular approach. This also means Mantle will offer low gas fees and increased security.
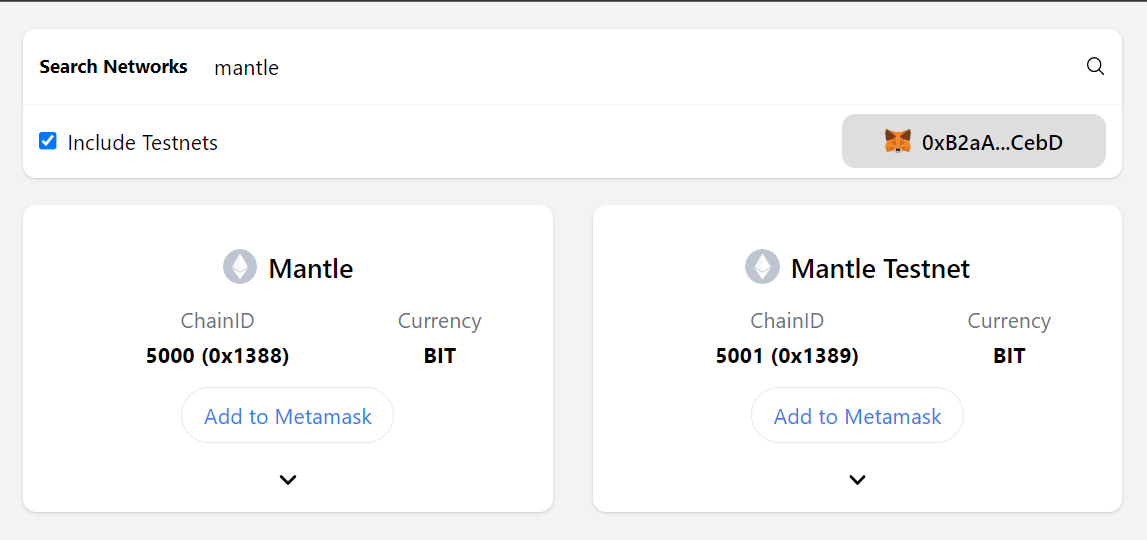
Before we proceed, We must make sure to have Metamask with Mantle Network added to your wallet, to do so visit Chainlist.
1. Connect your wallet to Chainlist and click Add to Metamask
Now let's claim some testnet $BIT tokens which will be used to pay for gas fees.
- Visit https://faucet.testnet.mantle.xyz/ and connect your metamask with Goerli Network where $BIT tokens will be minted and sent to your wallet.
Then head over to https://bridge.testnet.mantle.xyz/ and connect your wallet with Mantle test network. You can now bridge $BIT tokens from Goerli to Mantle Testnet.
Okay, so we have test $BIT, let's get started.
We will use Remix IDE for writing, compiling and deploying our contracts onto Mantle testnet. Remix IDE is the simplest and best IDE to get started.
Visit https://remix.ethereum.org/ to start writing your first contract.

Game plan
We will first create an ERC-20 token contract and then an ERC-721 NFT contract which will be used in our Rewarder contract.
If someone holds the NFT from our contract then the rewarder contract will give 100 ERC-20 tokens that we are creating.
1. ERC-20 Contract
Create a new file called
erc20.solundercontractsfolder in Remix IDE.Then copy-paste the code below, haha ik we all copy paste 😅
Just press ctrl+s, Remix will compile the contract.
Click the Ethereum-like icon and at the top, Click the dropdown that says REMIX VM (Shanghai), select Injected Provider to connect to our Metamask network.
Then click deploy button.
  // SPDX-License-Identifier: MIT
  pragma solidity ^0.8.9;

  import "@openzeppelin/contracts/token/ERC20/ERC20.sol";
  import "@openzeppelin/contracts/token/ERC20/extensions/ERC20Burnable.sol";
  import "@openzeppelin/contracts/access/Ownable.sol";

  contract MantleTutorialToken is ERC20, ERC20Burnable, Ownable {
      mapping(address => bool) private owners;

      constructor() ERC20("Mantle Tutorial", "MT") {
          _mint(msg.sender, 10 * 10 ** decimals());
          owners[msg.sender] = true; // Add the deployer as an owner
      }

      function mint(address to, uint256 amount) public ownerOnly {
          _mint(to, amount);
      }

      function addOwner(address newOwner) public ownerOnly {
          owners[newOwner] = true;
      }

      modifier ownerOnly() {
          require(owners[msg.sender], "Caller is not the owner");
          _;
      }
  }
Congrats we have deployed our first contract!
- NFT Contract
Create a new file called
erc721.solundercontractsfolder in Remix IDE.Then copy-paste the code below again.
Just like before press ctrl+s, Remix will compile the contract.
Click the Ethereum-like icon, since we already selected injected provider, we can directly click deploy button
pragma solidity ^0.8.9;

import "@openzeppelin/contracts/token/ERC721/ERC721.sol";
import "@openzeppelin/contracts/access/Ownable.sol";
import "@openzeppelin/contracts/utils/Counters.sol";

contract MantleTutorialContract is ERC721, Ownable {
    using Counters for Counters.Counter;

    Counters.Counter private _tokenIdCounter;

    constructor() ERC721("Mantle Tutorial", "MT") {}
    // dummy metadata URI for placeholder, you can replace with your own IPFS hash
    function _baseURI() internal pure override returns (string memory) {
        return "https://bafyreihz6dpge5g7e6o7sjn6x7yyukbhygr5uttv5mnuppasqqhut222ny.ipfs.dweb.link/metadata.json";
    }

    function safeMint(address to) public onlyOwner {
        uint256 tokenId = _tokenIdCounter.current();
        _tokenIdCounter.increment();
        _safeMint(to, tokenId);
    }
}
tada, we have deployed our NFT contract!
Main Rewarder Contract
- Follow the steps you did previously to compile and deploy.
pragma solidity ^0.8.0;


import "@openzeppelin/contracts/token/ERC721/ERC721.sol";
interface ERC20 {
    function mint(address to, uint256 amount) external;
    function balanceOf(address account) external view returns (uint256);
}

contract MantleContract {
    ERC721 public nftContract;
    ERC20 public tokenContract;
    uint256 public tokenAmount = 100;

    constructor(address _nftContract, address _tokenContract) {
        nftContract = ERC721(_nftContract);
        tokenContract = ERC20(_tokenContract);
    }

    function claimTokens() external {
        require(nftContract.balanceOf(msg.sender) > 0, "Caller does not own the required NFT");
         tokenContract.mint(msg.sender, 100 *1e18);
    }
}
Now its time to get some rewardssss, Now lets first mint one NFT from our NFT contract by calling safeMint function within Remix IDE
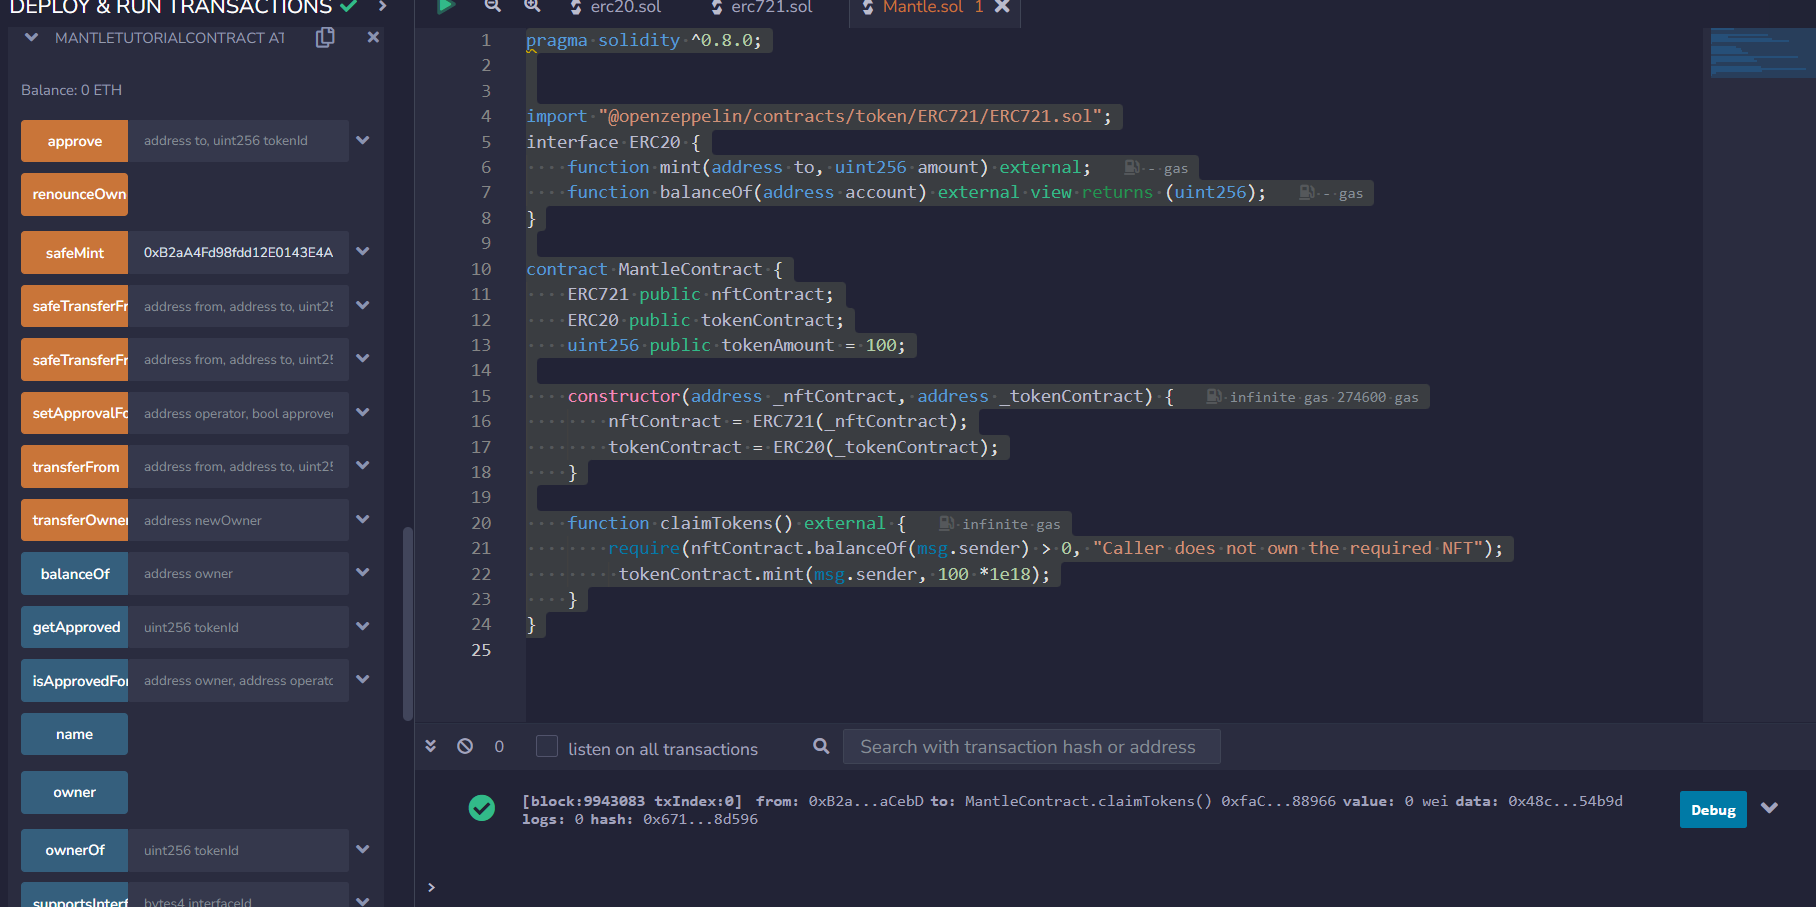
After that tx is done, let's go to our tokenContract and call addOwner function with input address as the address of our rewarded contract to allow our Rewarded contract to mint erc-20 tokens that we created.
We are ready to claim our rewards, simply call claimTokens function in our rewarded contract to enjoy some free rewards!
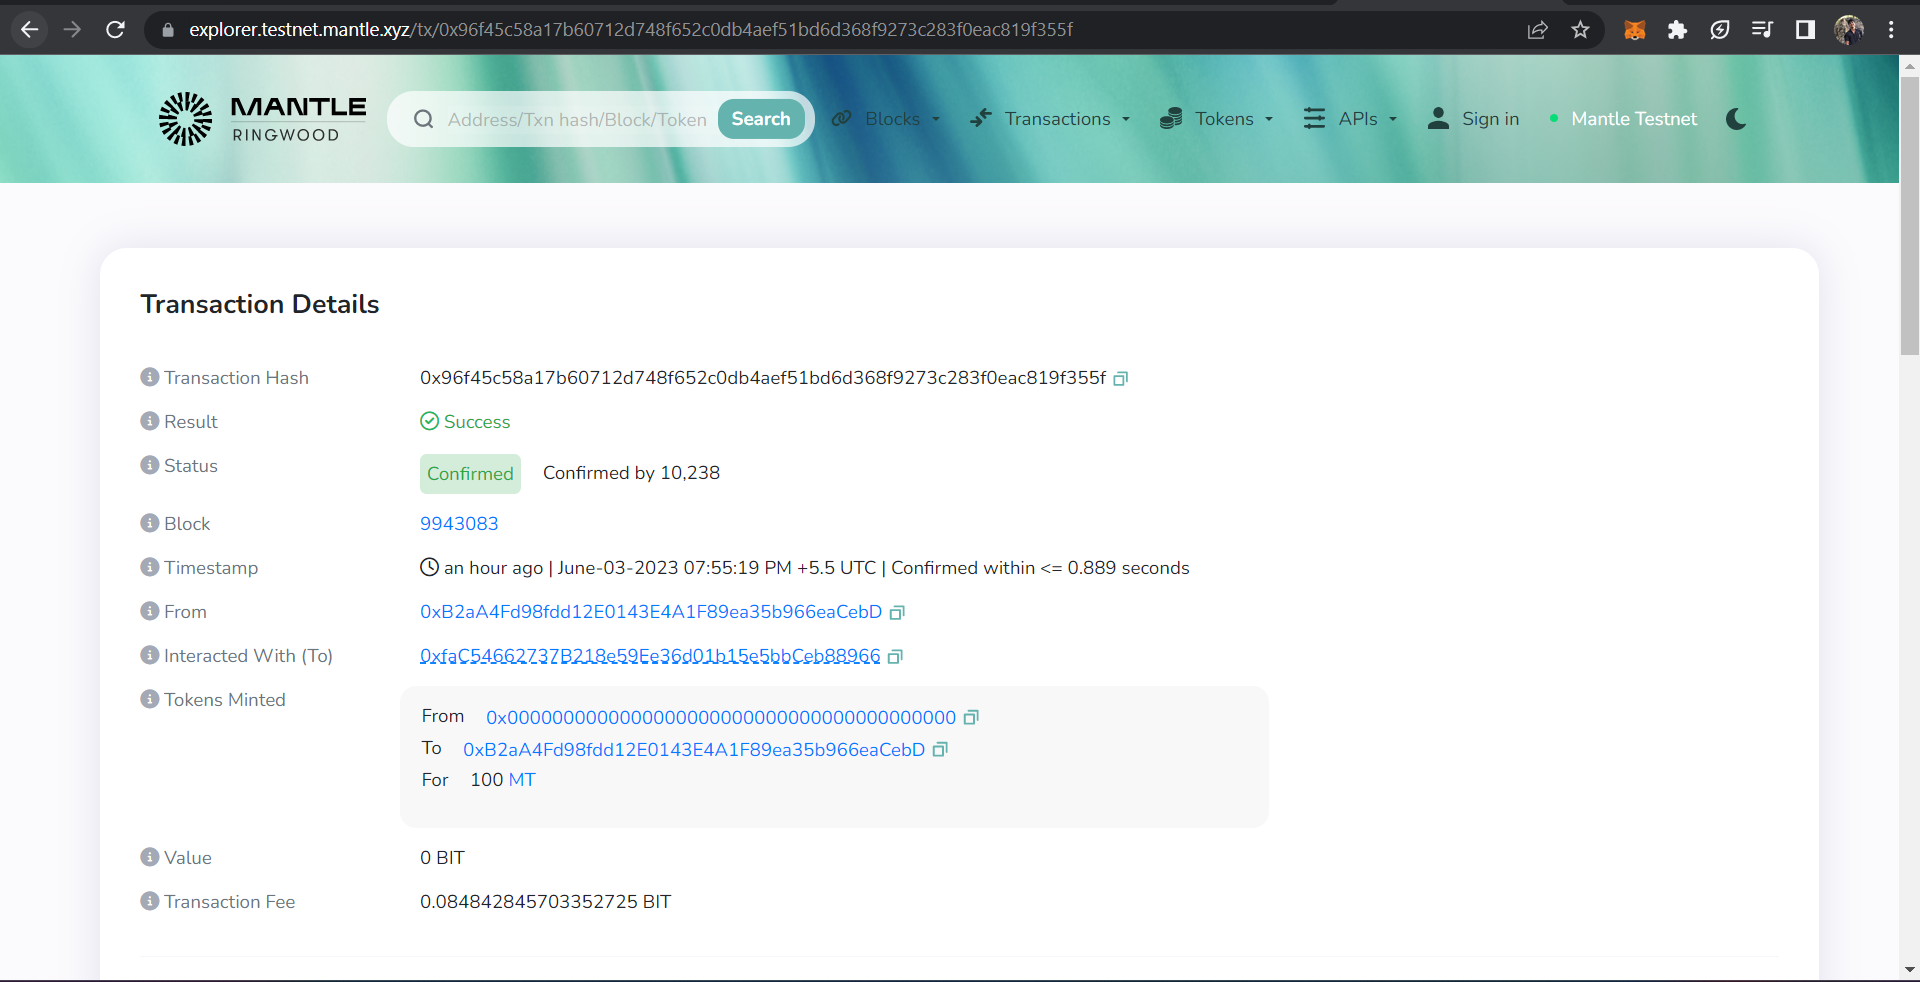
Here is a tx that I did, https://explorer.testnet.mantle.xyz/tx/0x96f45c58a17b60712d748f652c0db4aef51bd6d368f9273c283f0eac819f355f
Congrats, you're now a smart contract developer!
Conclusion
Mantle network is an L2 chain with faster finalty and cheaper gas fees and is governed by $BIT DAO. To learn more about Mantle network, visithttps://www.mantle.xyz/